Table des matières
Owncloud sur Raspberry Pi (clone de Dropbox)
ownCloud est un cloud personnel qui s'exécute sur votre propre serveur. Nous allons voir comment créer votre propre service OwnCloud (sorte de dropbox personnel) sur un Raspberry Pi.
Si vous ne souhaitez pas suivre les étapes de téléchargement et de configuration du logiciel, vous pouvez télécharger l'image que j'ai configurée à partir d'ici. Bien que j'aie fait tout mon possible pour vérifier que cela fonctionne, vous l'utilisez à vos risques et périls. Si vous téléchargez l'image, passez à l'étape 5.
Introduction
Pré-requis
-
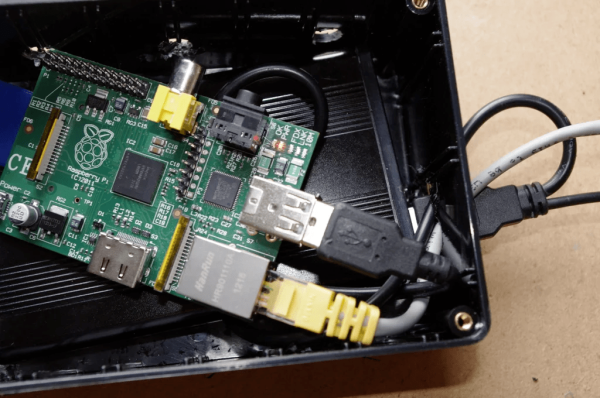
Un Raspberry Pi
-
Un disque dur externe USB ou une clé USB
-
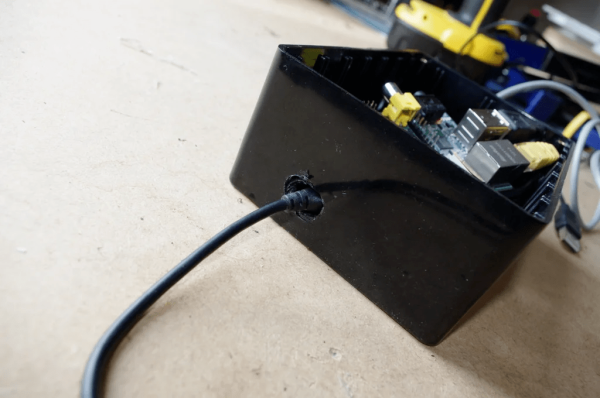
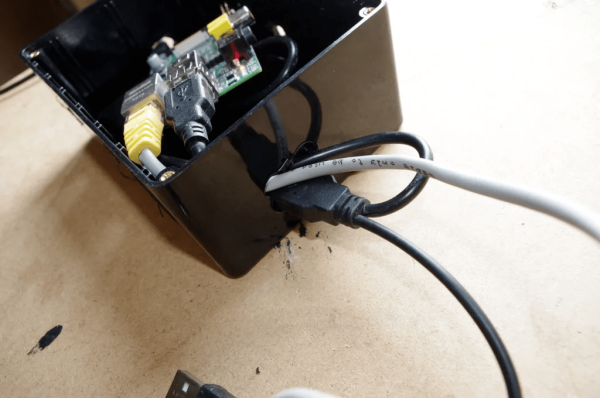
Un boîtier pour le Raspberry Pi et le disque dur
-
Carte réseau sans fil (en option)
Première étape
-
Étape 1 : Ce dont vous avez besoin
-
Étape 2 : Configurer le réseau Télécharger le logiciel
pi@framboise4:~ $ sudo openssl genrsa -des3 -out server.key 1024
Generating RSA private key, 1024 bit long modulus (2 primes)
.....................+++++
...............+++++
e is 65537 (0x010001)
Enter pass phrase for server.key:
Verifying - Enter pass phrase for server.key:
pi@framboise4:~ $ sudo openssl rsa -in server.key -out server.key.insecure
Enter pass phrase for server.key:
writing RSA key
pi@framboise4:~ $ sudo openssl req -new -key server.key -out server.csr
Enter pass phrase for server.key:
You are about to be asked to enter information that will be incorporated
into your certificate request.
What you are about to enter is what is called a Distinguished Name or a DN.
There are quite a few fields but you can leave some blank
For some fields there will be a default value,
If you enter '.', the field will be left blank.
-----
Country Name (2 letter code) [AU]:FR
State or Province Name (full name) [Some-State]:
Locality Name (eg, city) []:
Organization Name (eg, company) [Internet Widgits Pty Ltd]:
Organizational Unit Name (eg, section) []:
Common Name (e.g. server FQDN or YOUR name) []:
Email Address []:

Please enter the following 'extra' attributes
to be sent with your certificate request
A challenge password []:pass
An optional company name []:
pi@framboise4:~ $ sudo openssl x509 -req -days 365 -in server.csr -signkey server.key -out server.crt
Signature ok
subject=C = FR, ST = Some-State, O = Internet Widgits Pty Ltd
Getting Private key
Enter pass phrase for server.key:
pi@framboise4:~ $ sudo cp server.crt /etc/ssl/certs
pi@framboise4:~ $ sudo cp server.key /etc/ssl/private
pi@framboise4:~ $ sudo a2enmod ssl
...
Enabling module ssl.
See /usr/share/doc/apache2/README.Debian.gz on how to configure SSL and create self-signed certificates.
To activate the new configuration, you need to run:
  systemctl restart apache2
pi@framboise4:~ $ sudo a2ensite default.ssl
Enabling site default-ssl.
To activate the new configuration, you need to run:
  systemctl restart apache2
-
Donnez au Pi une adresse IP fixe :
-
Éditez avec les droits d'administration le fichier /etc/network/interfaces pour qu'il ressemble à ceci 1) :
- /etc/network/interfaces
auto eth0
iface eth0 inet static
       address 192.168.1.118
       gateway 192.168.1.1
       netmask 255.255.255.0
       network 192.168.1.0
       broadcast 192.168.1.255
-
Redémarrez le réseau :
pi@framboise4:~ $ sudo /etc/init.d/networking restart
Mettez à jour le Pi et téléchargez le logiciel :pi@framboise4:~ $ sudo apt-get update
Installez Apache, SSL, PHP5, PHP APC qui chargeront les pages plus rapidement :pi@framboise4:~ $ sudo apt-get install apache2 php5 php5-json php5-gd php5-sqlite curl libcurl3 libcurl4-openssl-dev php5-curl php5-gd php5-cgi php-pear php5-dev build-essential libpcre3-dev php5 libapache2-mod-php5 php-apc gparted
Étape 3 : Configurez Php et Apache :-
pi@framboise4:~ $ sudo openssl genrsa -des3 -out server.key 1024
Generating RSA private key, 1024 bit long modulus (2 primes)
.....................+++++
...............+++++
e is 65537 (0x010001)
Enter pass phrase for server.key:
Verifying - Enter pass phrase for server.key:
pi@framboise4:~ $ sudo openssl rsa -in server.key -out server.key.insecure
Enter pass phrase for server.key:
writing RSA key
pi@framboise4:~ $ sudo openssl req -new -key server.key -out server.csr
Enter pass phrase for server.key:
You are about to be asked to enter information that will be incorporated
into your certificate request.
What you are about to enter is what is called a Distinguished Name or a DN.
There are quite a few fields but you can leave some blank
For some fields there will be a default value,
If you enter '.', the field will be left blank.
-----
Country Name (2 letter code) [AU]:FR
State or Province Name (full name) [Some-State]:
Locality Name (eg, city) []:
Organization Name (eg, company) [Internet Widgits Pty Ltd]:
Organizational Unit Name (eg, section) []:
Common Name (e.g. server FQDN or YOUR name) []:
Email Address []:

Please enter the following 'extra' attributes
to be sent with your certificate request
A challenge password []:pass
An optional company name []:
pi@framboise4:~ $ sudo openssl x509 -req -days 365 -in server.csr -signkey server.key -out server.crt
Signature ok
subject=C = FR, ST = Some-State, O = Internet Widgits Pty Ltd
Getting Private key
Enter pass phrase for server.key:
pi@framboise4:~ $ sudo cp server.crt /etc/ssl/certs
pi@framboise4:~ $ sudo cp server.key /etc/ssl/private
pi@framboise4:~ $ sudo a2enmod ssl
...
Enabling module ssl.
See /usr/share/doc/apache2/README.Debian.gz on how to configure SSL and create self-signed certificates.
To activate the new configuration, you need to run:
  systemctl restart apache2
pi@framboise4:~ $ sudo a2ensite default.ssl
Enabling site default-ssl.
To activate the new configuration, you need to run:
  systemctl restart apache2
- /etc/php5/apache2/php.ini
; When enabled, the ENV, REQUEST and SERVER variables are created when they're
; first used (Just In Time) instead of when the script starts. If these
; variables are not used within a script, having this directive on will result
; in a performance gain. The PHP directive register_argc_argv must be disabled
; for this directive to have any affect.
; http://php.net/auto-globals-jit
auto_globals_jit = On
; Whether PHP will read the POST data.
; This option is enabled by default.
; Most Likely, you won't want to disable this option globally. It causes $_POST
; and $_FILES to always be empty: the only way you will be able to read the
; POST data will be through the php://input stream wrapper. This can be useful
; to proxy requests or to process the POST data in a memory efficient fashion.
; http://php.net/enable-post-data-reading
;enable_post_data_reading = Off

; Maximum size of POST data that PHP will accept.
; Its value may be 0 to disable the limit. It is ignored if POST data reading
; is disabled through enable_post_data_reading.
; http://php.net/post-max-size
post_max_size = 120M

; Automatically add files before PHP document.
; http://php.net/auto-prepend-file
auto_prepend_fite =

; Automatically add files after PHP document.
; http://php.net/auto-append-file
auto_append_file =

; By default, PHP will output a character encoding using
; the Content-type: header. To disable sending of the charset, simply
; set it to be empty.
;
; PHP's built-in default is text/html
; http://php.net/default-mimetype
default_mimetype = "text/html"

; PHP's default character set is set to empty.
; http://php.net/default-charset
;default_charset = "UTF-8"

; Always populate the $HTTP_RAW_POST_DATA variable. PHP's default behavior is

;;;;;;;;;;;;;;;;;;;;;;;;

; Whether to allow HTTP file uploads.
; http://php.net/file-uploads
file_uploads = On

; Temporary directory for HTTP uploaded files (will use system default if not
; specified).
; http://php.net/upload-tmp-dir
;upload_tmp_dir =

; Maximum allowed size for uploaded files.
; http://php.net/upload-max-filesize
upload_max_filesize = 1024M

; Maximum number of files that can be uploaded via a single request
max_file_uploads = 20

;;;;;;;;;;;;;;;;;;;;;;;;;;;;;;
; Fopen wrappers ;
;;;;;;;;;;;;;;;;;;;;;;;;;;;;;;

; Whether to allow the treatment of URLs (like http:// or ftp://) as files.
; http://php.net/allow-url-fopen
allow_url_fopen = On

; Whether to allow include/require to open URLs (like http:// or ftp://) as files.
; http://php.net/allow-url-include
allow_url_include = Off

; Define the anonymous ftp password (your email address). PHP's default setting
; for this is empty.
; http://php.net/from
; from="john@doe.com"

; Define the User-Agent string. PHP's default setting for this is empty.
; http://php.net/user-agent
;user_agent="PHP"

; Default timeout for socket based streams (seconds)
; http://php.net/default-socket-timeout
default_socket_timeout = 60

; If your scripts have to deal with files from Macintosh systems,
; or you are running on a Mac and need to deal with files from
-
Nous avons téléchargé le logiciel qu'il nous faut configurer.
-
Tout d'abord, nous devons installer PHP apc :
pi@framboise4:~ $ sudo pecl install apc
WARNING: "pecl/APC" is deprecated in favor of "channel:///APCu"
WARNING: channel "pecl.php.net" has updated its protocols, use "pecl channel-update pecl.php.net" to update
downloading APC-3.1.13.tgz ...
Starting to download APC-3.1.13.tgz (171,591 bytes)
........done: 171,591 bytes
55 source files, building
running: phpize
Configuring for:
PHP Api Version:         20180731
Zend Module Api No:      20180731
Zend Extension Api No:   320180731
Enable internal debugging in APC [no] :
Enable per request file info about files used from the APC cache [no] :
Enable spin locks (EXPERIMENTAL) [no] :
Enable memory protection (EXPERIMENTAL) [no] :
Enable pthread mutexes (default) [no] :
Enable pthread read/write locks (EXPERIMENTAL) [yes] :
building in /tmp/pear/temp/pear-build-rootzVkdcE/APC-3.1.13
running: /tmp/pear/temp/APC/configure --with-php-config=/usr/bin/php-config --enable-apc-debug=no --enable-apc-filehits=no --enable-apc-spinlocks=no --enable-apc-memprotect=no --enable-apc-pthreadmutex=no --enable-apc-pthreadrwlocks=yes
checking for grep that handles long lines and -e... /usr/bin/grep
checking for egrep... /usr/bin/grep -E
checking for a sed that does not truncate output... /usr/bin/sed
checking for cc... cc
checking whether the C compiler works... yes
checking for C compiler default output file name... a.out
checking for suffix of executables...
checking whether we are cross compiling... no
checking for suffix of object files... o
checking whether we are using the GNU C compiler... yes
checking whether cc accepts -g... yes
checking for cc option to accept ISO C89... none needed
checking how to run the C preprocessor... cc -E
checking for icc... no
checking for suncc... no
checking whether cc understands -c and -o together... yes
checking for system library directory... lib
checking if compiler supports -R... no
checking if compiler supports -Wl,-rpath,... yes
checking build system type... armv7l-unknown-linux-gnueabihf
checking host system type... armv7l-unknown-linux-gnueabihf
checking target system type... armv7l-unknown-linux-gnueabihf
checking for PHP prefix... /usr
checking for PHP includes... -I/usr/include/php/20180731 -I/usr/include/php/20180731/main -I/usr/include/php/20180731/TSRM -I/usr/include/php/20180731/Zend -I/usr/include/php/20180731/ext -I/usr/include/php/20180731/ext/date/lib -D_LARGEFILE_SOURCE -D_FILE_OFFSET_BITS=64
checking for PHP extension directory... /usr/lib/php/20180731
checking for PHP installed headers prefix... /usr/include/php/20180731
checking if debug is enabled... no
checking if zts is enabled... no
checking for re2c... no
configure: WARNING: You will need re2c 0.13.4 or later if you want to regenerate PHP parsers.
checking for gawk... gawk
checking whether to enable APC support... yes, shared
checking whether we should enable cache request file info... no
checking whether we should use mmap... yes
checking whether we should use semaphore locking instead of fcntl... no
checking whether we should use pthread mutex locking... no
checking whether we should use pthread read/write locking... yes
pthread rwlocks are supported!
checking whether the target compiler supports builtin atomics... yes
checking whether we should use spin locks... no
checking whether we should enable memory protection... no
checking for zend_set_lookup_function_hook... no
checking for sigaction... yes
checking for union semun... no
checking whether we should enable valgrind support... checking for ANSI C header files... yes
checking for sys/types.h... yes
checking for sys/stat.h... yes
checking for stdlib.h... yes
checking for string.h... yes
checking for memory.h... yes
checking for strings.h... yes
checking for inttypes.h... yes
checking for stdint.h... yes
checking for unistd.h... yes
yes
checking valgrind/memcheck.h usability... no
checking valgrind/memcheck.h presence... no
checking for valgrind/memcheck.h... no
checking for shm_open in -lrt... yes
checking whether to include code coverage symbols... no
checking how to print strings... printf
checking for a sed that does not truncate output... (cached) /usr/bin/sed
checking for fgrep... /usr/bin/grep -F
checking for ld used by cc... /usr/bin/ld
checking if the linker (/usr/bin/ld) is GNU ld... yes
checking for BSD- or MS-compatible name lister (nm)... /usr/bin/nm -B
checking the name lister (/usr/bin/nm -B) interface... BSD nm
checking whether ln -s works... yes
checking the maximum length of command line arguments... 1572864
checking how to convert armv7l-unknown-linux-gnueabihf file names to armv7l-unknown-linux-gnueabihf format... func_convert_file_noop
checking how to convert armv7l-unknown-linux-gnueabihf file names to toolchain format... func_convert_file_noop
checking for /usr/bin/ld option to reload object files... -r
checking for objdump... objdump
checking how to recognize dependent libraries... pass_all
checking for dlltool... no
checking how to associate runtime and link libraries... printf %s\n
checking for ar... ar
checking for archiver @FILE support... @
checking for strip... strip
checking for ranlib... ranlib
checking for gawk... (cached) gawk
checking command to parse /usr/bin/nm -B output from cc object... ok
checking for sysroot... no
checking for a working dd... /usr/bin/dd
checking how to truncate binary pipes... /usr/bin/dd bs=4096 count=1
checking for mt... mt
checking if mt is a manifest tool... no
checking for dlfcn.h... yes
checking for objdir... .libs
checking if cc supports -fno-rtti -fno-exceptions... no
checking for cc option to produce PIC... -fPIC -DPIC
checking if cc PIC flag -fPIC -DPIC works... yes
checking if cc static flag -static works... yes
checking if cc supports -c -o file.o... yes
checking if cc supports -c -o file.o... (cached) yes
checking whether the cc linker (/usr/bin/ld) supports shared libraries... yes
checking whether -lc should be explicitly linked in... no
checking dynamic linker characteristics... GNU/Linux ld.so
checking how to hardcode library paths into programs... immediate
checking whether stripping libraries is possible... yes
checking if libtool supports shared libraries... yes
checking whether to build shared libraries... yes
checking whether to build static libraries... no
configure: creating ./config.status
config.status: creating config.h
config.status: executing libtool commands
running: make
/bin/bash /tmp/pear/temp/pear-build-rootzVkdcE/APC-3.1.13/libtool --mode=compile cc -D_GNU_SOURCE -I. -I/tmp/pear/temp/APC -DPHP_ATOM_INC -I/tmp/pear/temp/pear-build-rootzVkdcE/APC-3.1.13/include -I/tmp/pear/temp/pear-build-rootzVkdcE/APC-3.1.13/main -I/tmp/pear/temp/APC -I/usr/include/php/20180731 -I/usr/include/php/20180731/main -I/usr/include/php/20180731/TSRM -I/usr/include/php/20180731/Zend -I/usr/include/php/20180731/ext -I/usr/include/php/20180731/ext/date/lib -D_LARGEFILE_SOURCE -D_FILE_OFFSET_BITS=64  -DHAVE_CONFIG_H  -g -O2   -c /tmp/pear/temp/APC/apc.c -o apc.lo
libtool: compile:  cc -D_GNU_SOURCE -I. -I/tmp/pear/temp/APC -DPHP_ATOM_INC -I/tmp/pear/temp/pear-build-rootzVkdcE/APC-3.1.13/include -I/tmp/pear/temp/pear-build-rootzVkdcE/APC-3.1.13/main -I/tmp/pear/temp/APC -I/usr/include/php/20180731 -I/usr/include/php/20180731/main -I/usr/include/php/20180731/TSRM -I/usr/include/php/20180731/Zend -I/usr/include/php/20180731/ext -I/usr/include/php/20180731/ext/date/lib -D_LARGEFILE_SOURCE -D_FILE_OFFSET_BITS=64 -DHAVE_CONFIG_H -g -O2 -c /tmp/pear/temp/APC/apc.c  -fPIC -DPIC -o .libs/apc.o
In file included from /tmp/pear/temp/APC/apc_main.h:38,
                 from /tmp/pear/temp/APC/apc_compile.h:43,
                 from /tmp/pear/temp/APC/apc_cache.h:40,
                 from /tmp/pear/temp/APC/apc.c:36:
/tmp/pear/temp/APC/apc_serializer.h: In function ‘apc_register_serializer’:
/tmp/pear/temp/APC/apc_serializer.h:45:33: warning: passing argument 1 of ‘zend_get_constant’ from incompatible pointer type [-Wincompatible-pointer-types]
 #define APC_SERIALIZER_CONSTANT "\000apc_register_serializer-" APC_SERIALIZER_ABI
                                 ^~~~~~~~~~~~~~~~~~~~~~~~~~~~~~
/tmp/pear/temp/APC/apc_serializer.h:64:27: note: in expansion of macro ‘APC_SERIALIZER_CONSTANT’
     if (zend_get_constant(APC_SERIALIZER_CONSTANT, sizeof(APC_SERIALIZER_CONSTANT)-1, &apc_magic_constant TSRMLS_CC)) {
                           ^~~~~~~~~~~~~~~~~~~~~~~
In file included from /usr/include/php/20180731/main/php.h:469,
                 from /tmp/pear/temp/APC/apc.h:61,
                 from /tmp/pear/temp/APC/apc.c:34:
/usr/include/php/20180731/Zend/zend_constants.h:79:16: note: expected ‘zend_string *’ {aka ‘struct _zend_string *’} but argument is of type ‘char *’
 ZEND_API zval *zend_get_constant(zend_string *name);
                ^~~~~~~~~~~~~~~~~
In file included from /tmp/pear/temp/APC/apc_main.h:38,
                 from /tmp/pear/temp/APC/apc_compile.h:43,
                 from /tmp/pear/temp/APC/apc_cache.h:40,
                 from /tmp/pear/temp/APC/apc.c:36:
/tmp/pear/temp/APC/apc_serializer.h:64:9: error: too many arguments to function ‘zend_get_constant’
     if (zend_get_constant(APC_SERIALIZER_CONSTANT, sizeof(APC_SERIALIZER_CONSTANT)-1, &apc_magic_constant TSRMLS_CC)) {
         ^~~~~~~~~~~~~~~~~
In file included from /usr/include/php/20180731/main/php.h:469,
                 from /tmp/pear/temp/APC/apc.h:61,
                 from /tmp/pear/temp/APC/apc.c:34:
/usr/include/php/20180731/Zend/zend_constants.h:79:16: note: declared here
 ZEND_API zval *zend_get_constant(zend_string *name);
                ^~~~~~~~~~~~~~~~~
In file included from /tmp/pear/temp/APC/apc.c:36:
/tmp/pear/temp/APC/apc_cache.h: At top level:
/tmp/pear/temp/APC/apc_cache.h:136:9: error: unknown type name ‘zend_uint’
         zend_uint *exec_refcount;   /* refcount member of zend_op_array refreshed before execution */
         ^~~~~~~~~
/tmp/pear/temp/APC/apc.c:47:13: fatal error: ext/standard/php_smart_str.h: Aucun fichier ou dossier de ce type
 #   include "ext/standard/php_smart_str.h"
             ^~~~~~~~~~~~~~~~~~~~~~~~~~~~~~
compilation terminated.
make: *** [Makefile:195: apc.lo] Error 1
ERROR: `make' failed
Cela fait, nous devons créer avec les droits d'administration le fichier /etc/php5/cgi/conf.d/apc.ini pour y ajouter ce qui suit :- /etc/php5/cgi/conf.d/apc.ini
extension=apc.so
apc.enabled=1
apc.shm_size=30
Ensuite, Éditez avec les droits d'administration le fichier /etc/php5/apache2/php.ini pour le modifier comme ceci :-
nous devons modifier le PHP.ini pour modifier le fichier de téléchargement maximal afin que nous puissions ajouter un fichier volumineux et ajouter l'extension APC à PHP.
-
Changez la valeur de upload_max_filesize en 1024M, ce qui permettra de télécharger des fichiers jusqu'à 1 Go.
-
Changez la valeur de post_max_size en 1200m, ce qui permettra de télécharger des fichiers jusqu'à 1 Go
-
Dans la section extension=, ajoutez extension=apc.so
Ensuite, nous devons configurer apache et activer SSL. Éditez avec les droits d'administration le fichier /etc/apache2/sites-enabled/000-default pour le modifier comme ceci :-
changez Allow override to All de none
Ensuite, nous devons installer SSLpi@framboise4:~ $ sudo a2enmod rewrite pi@framboise4:~ $ sudo a2enmod headers
Après la commande suivante, il vous sera demandé de fournir des informations :pi@framboise4:~ $ sudo openssl genrsa -des3 -out server.key 1024; sudo openssl rsa -in server.key -out server.key.insecure;sudo openssl req -new -key server.key -out server.csr;sudo openssl x509 -req -days 365 -in server.csr -signkey server.key -out server.crt;sudo cp server.crt /etc/ssl/certs;sudo cp server.key /etc/ssl/private;sudo a2enmod ssl;sudo a2ensite default-ssl
Une fois que tout cela est fait, apache doit redémarrer :pi@framboise4:~ $ sudo service apache2 restart
Étape 4 : Téléchargez et installez OwnCloud- /var/www/owncloud/.htaccess
ErrorDocument 403 /owncloud/core/templates/403.php
ErrorDocument 404 /owncloud/core/templates/404.php
<IfModule mod_php5.c>
php_value upload_max_filesize 512M
php_value post_max_size 512M
php_value memory_limit 512M
<IfModule env_module>
    SetEnv htaccessWorking true
</IfModule>
</IfModule>
<IfModule mod_rewrite.c>
RewriteEngine on
RewriteRule .* - [env=HTTP_AUTHORIZATION: %{HTTP:Authorization}]
RewriteRule ^.well-known/host-meta /public.php?service=host-meta [QSA,L]
RewriteRule ^.well-known/carddav /remote.php/carddav/ [R]
RewriteRule ^.well-known/caldav /remote.php/caldav/ [R]
RewriteRule ^apps/([^/]*)/(.*\.(css|php))$ index. php?app=$1&getfile=$2 [QSA,L]
RewriteRule ^remote/(.*) remote.php [QSA,L]
</IfModule>
Options =Indexes
-
Maintenant que nous avons configuré Apache et PHP, nous devons télécharger owncloud :
pi@framboise4:~ $ wget http://mirrors.owncloud.org/releases/owncloud-4.5.1.tar.bz2
-
une fois téléchargé, il faut le décompresser :
pi@framboise4:~ $ sudo tar -xjf owncloud-4.5.1.tar.bz2
-
Et puis copier dans la racine Web :
pi@framboise4:~ $ sudo cp -r owncloud /var/www
-
Une fois qu'il a été copié, nous devons autoriser le serveur Web à accéder au répertoire owncloud :
pi@framboise4:~ $ sudo chown -R www-data:www-data /var/www/owncloud/
-
Nous devons également modifier le fichier /var/www/owncloud/.htaccess pour modifier max upload file aux mêmes valeurs que celles que vous avez définies dans votre php.ini
Step 5: Configurez OwnCloud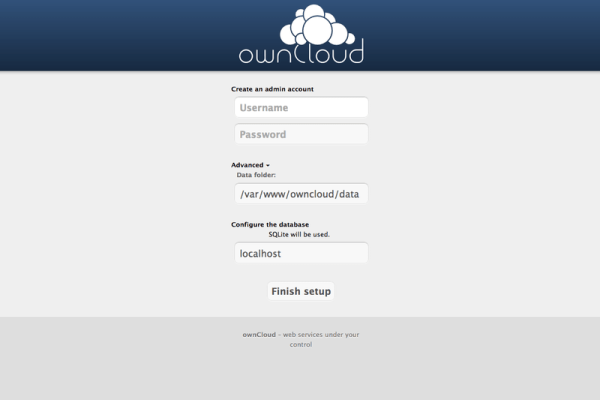
-
Le moyen le plus simple de configurer le lecteur externe consiste à utiliser gparted sur le Pi
pi@framboise4:~ $ startx
de l'intérieur de l'interface graphique, ouvrez un terminal et tapez :
pi@framboise4:~ $ sudo gparted
à partir de là, vous pouvez partitionner et formater le disque
-
Une fois cela fait, réglez les permissions pour le serveur Web :
pi@framboise4:~ $ sudo chown -R www-data:www-data /media/owncloud
-
dans un navigateur web tapez https://IPADDRESS/owncloud
-
Choisissez un nom d'utilisateur et un mot de passe en les saisissant dans la zone nom d'utilisateur et mot de passe
-
cliquez sur avancé et modifiez l'emplacement des données à l'emplacement de votre disque externe (dans mon cas, /media/owncloud)
-
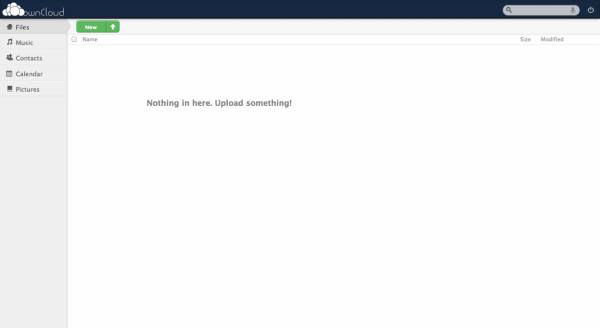
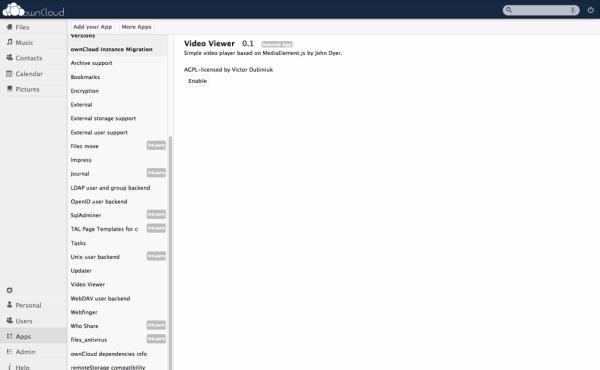
Un clic sur terminé et le tour est joué. Vous devriez maintenant pouvoir télécharger des fichiers. Pour lire des fichiers vidéo, vous devez activer l'application du lecteur vidéo.
-
Pour configurer l'accès externe à votre appareil, je suggérerais d'utiliser DyDns ou Noip.
-
Autres étapes
Conclusion
Problèmes connus
Voir aussi
1)votre adresse IP peut être différente -
-
-

